4. Configure Your FluxNode
After Arcane OS has rebooted, you’ll land on the Launch Screen, where you begin your FluxNode setup.
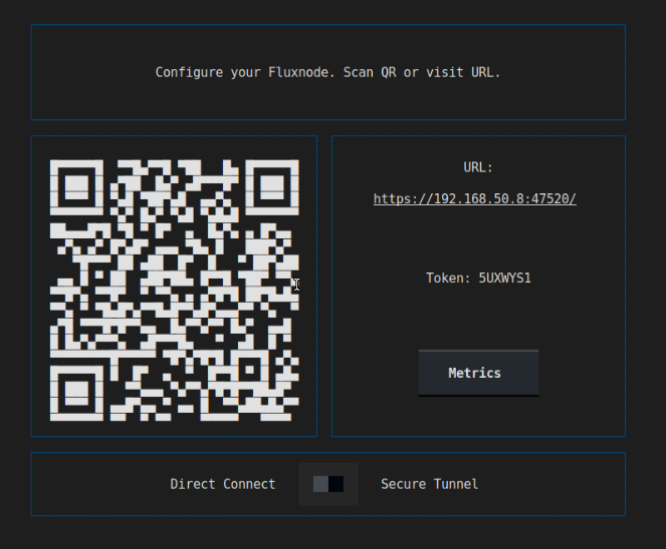
Launch Screen Overview
| Display Element | Description |
|---|---|
| Local IP & Port | The address on which your node’s web UI is hosted |
| Configuration URL | Type this into your browser (console copy/paste is disabled) |
| QR Code | Scan with your phone or a desktop QR‑reader extension to access the URL and token quickly |
| Secure Tunnel (Optional) | Enables an outbound proxy for nodes on private IPs, providing a temporary public address; auto‑disabled for public‑IP hosts |
⚠️ Note: If you cannot connect via LAN, enable Secure Tunnel. Otherwise, leave it off.
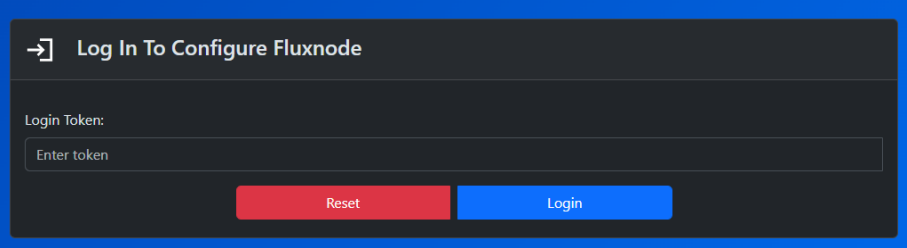
Accessing the Node UI
- Open your browser and open the Configuration URL displayed at the Launch Screen.
- At the Token Entry prompt, type the one‑time token shown in your console of the Launch Screen.
- Click Submit to unlock the FluxNode setup interface.
Configuration Methods
You may configure your FluxNode using one of four methods—select the one that best fits your setup and expertise:
- Manual Configuration
Manually copy and paste node credentials (Private Key, Collateral TX ID, Output Index, Flux ID) from your ZelCore Wallet into the ArcaneOS UI. - Webhook Integration (Advanced)
Connect ArcaneOS to an external service or script via a webhook for programmatic node configuration. - ZelCore/SSP Token Import
Generate a one‑time token in your ZelCore or SSP Wallet and paste it into the ArcaneOS setup screen to auto‑populate all fields. - JSON/YAML Import
Upload a previously exported JSON or YAML configuration file—ideal for restoring settings when reinstalling a node or using a provided sample.
In this guide, we’ll cover three methods:
- Manual Configuration
- ZelCore Token Import
- SSP Token Import