Minecraft
This guide walks you through the process of deploying, managing, and connecting to a Minecraft Java Edition Game Server using FluxCloud. Whether you’re setting up a new server or maintaining an existing one, this page provides step-by-step instructions and key details for a seamless experience.
The FluxCloud Minecraft Java template is built on the popular itzg/minecraft-server image, which supports Vanilla, Paper, Spigot, Forge, NeoForge, Fabric and many other server types out of the box.
For more information on Minecraft visit: https://www.minecraft.net. For the server image documentation, see: https://github.com/itzg/docker-minecraft-server.
💡 Looking for Bedrock Edition? Deploying a server for phones, consoles, or Windows 10/11 Bedrock clients uses a different template — see the Minecraft Bedrock guide.
🚀 Dedicated Minecraft hosting portal: Minecraft on Flux now has its own purpose-built site at minecraft.runonflux.com. It gives you a streamlined checkout (pay by card or subscription via Stripe, or with FLUX crypto) and a dedicated management dashboard — live CPU/RAM/disk stats, an in-browser terminal and file manager, one-click backups, billing and renewal controls, and a global server-location map. Clicking the Minecraft tile in the FluxCloud Marketplace now redirects you there automatically. The Marketplace walkthrough below still applies — the configuration options are the same, and your server runs as a standard Flux app you can also manage from cloud.runonflux.com.
How To Install a MinecraftServer
Steps
- Access FluxCloud
- Visit minecraft.runonflux.com — the dedicated Minecraft hosting portal — and sign in or create an account. (Going through cloud.runonflux.com works too: clicking the Minecraft tile in the Marketplace redirects you there automatically.)
- Find the Minecraft Server
- Navigate to the Marketplace → Games tab, then locate the Minecraft tile and click View Details.
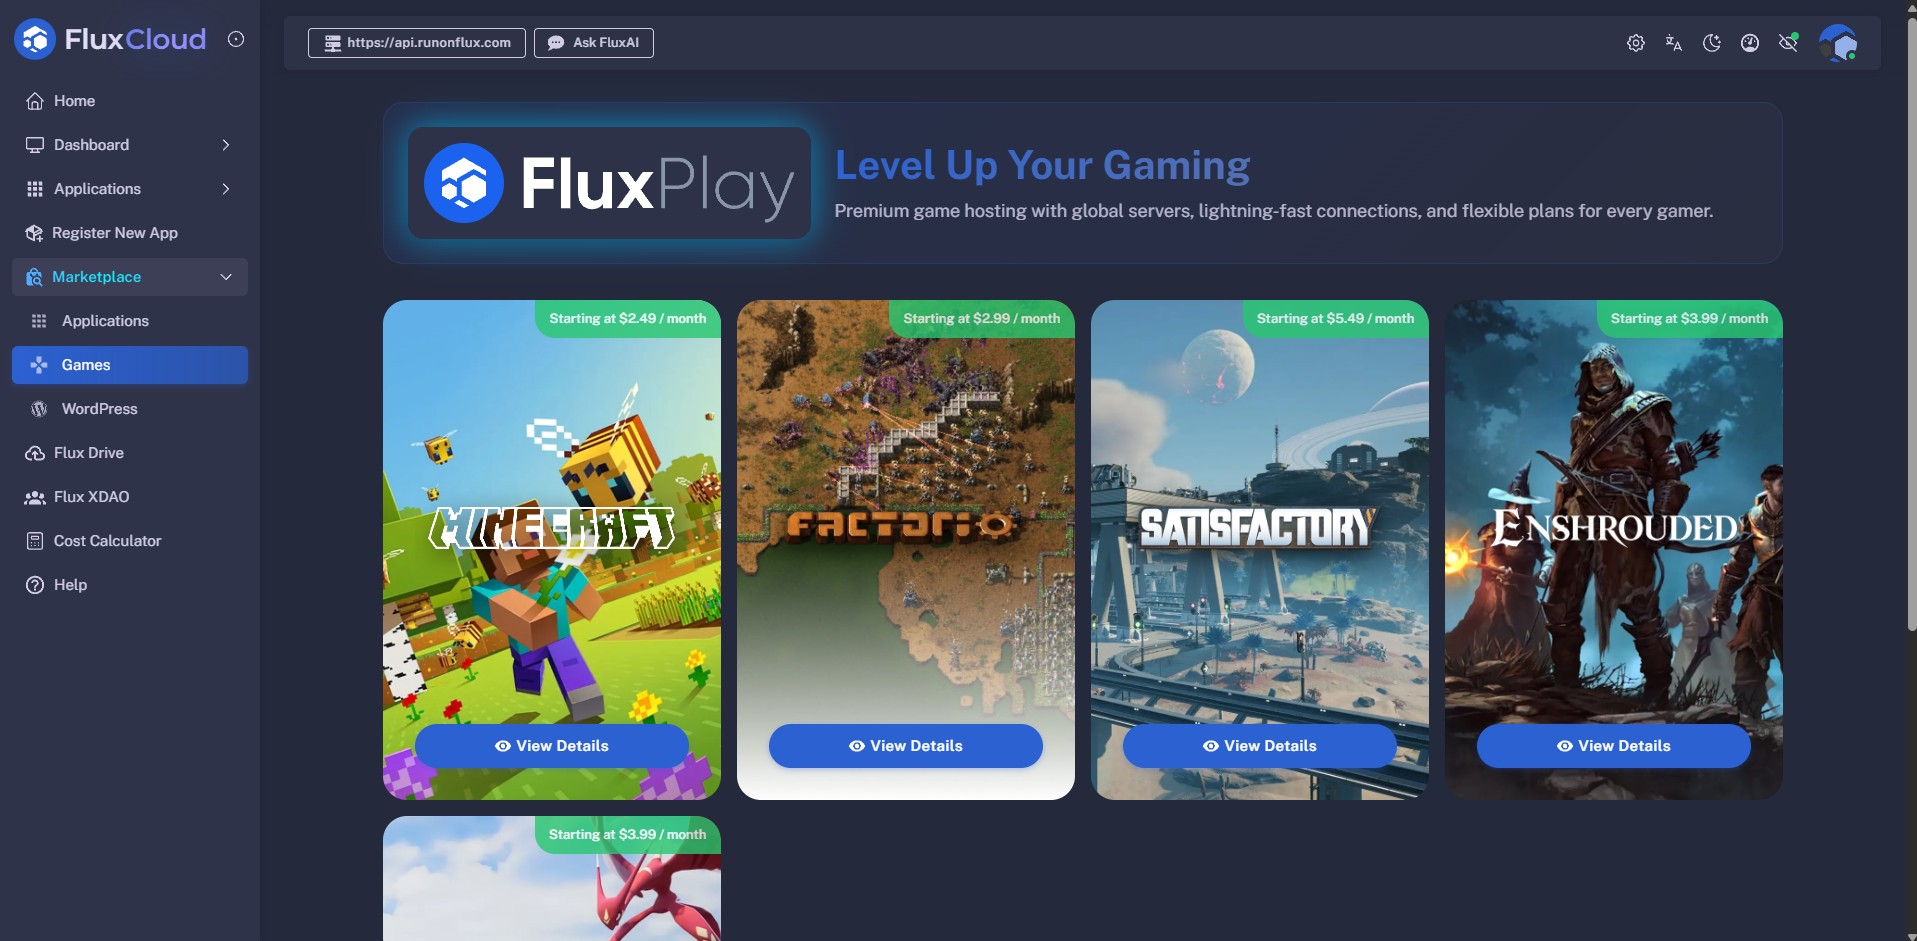
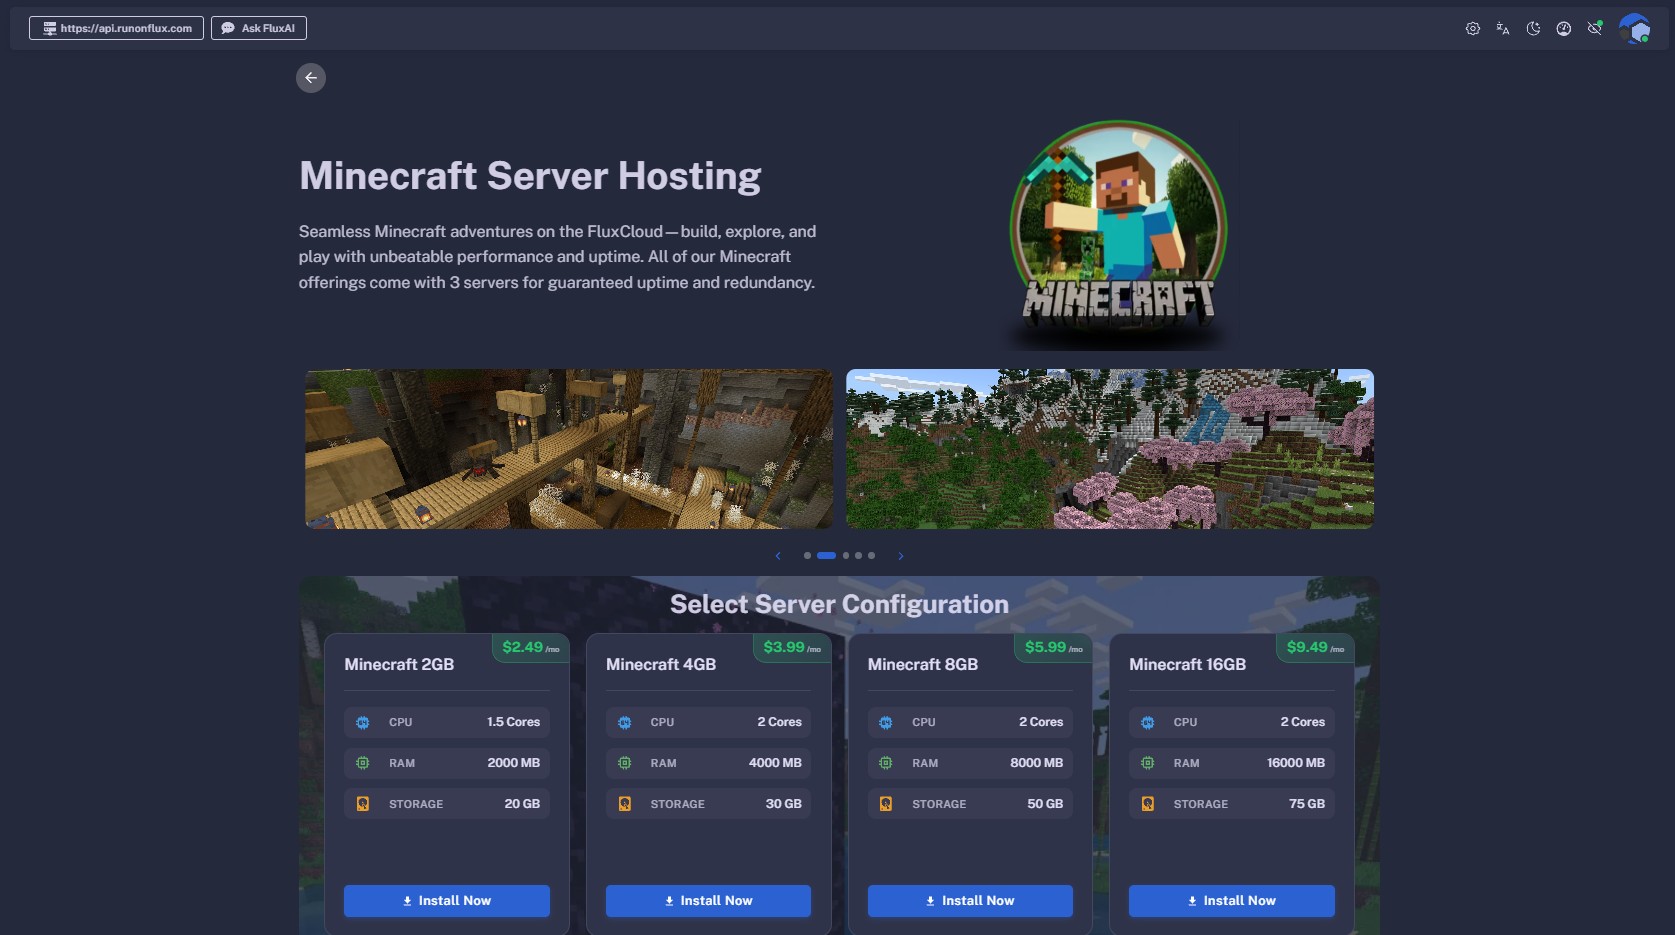
- Select Server Configuration
- Choose your preferred configuration, and click Install Now to continue.
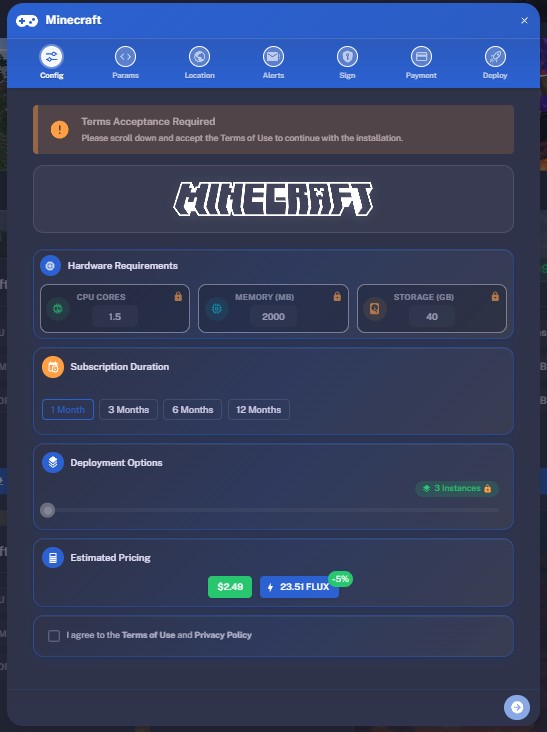
- Choose Subscription
- Select your desired subscription duration.
- Agree to the Terms of Use and Privacy Policy, and click the blue Continue arrow at the bottom.
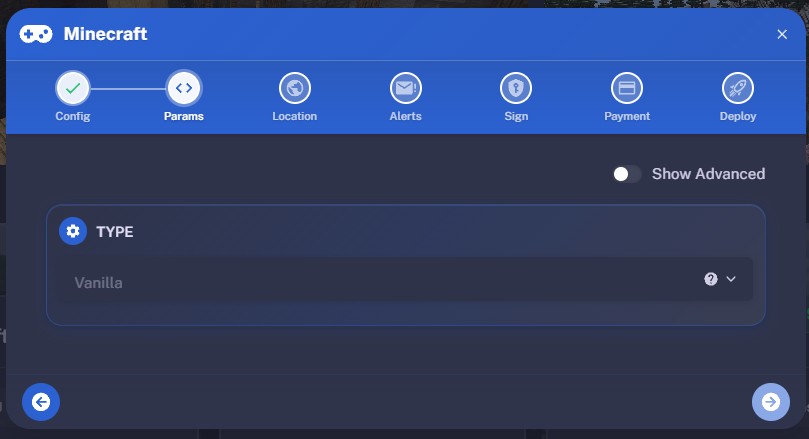
- Choose Server Type
- Select the type of Minecraft server you want to deploy: Vanilla, Paper, Forge, NeoForge, or Fabric.
- Enable Show Advanced to access additional configuration options, including the Minecraft version (to pin a specific version — recommended for modded servers), difficulty, game mode, and other advanced settings.
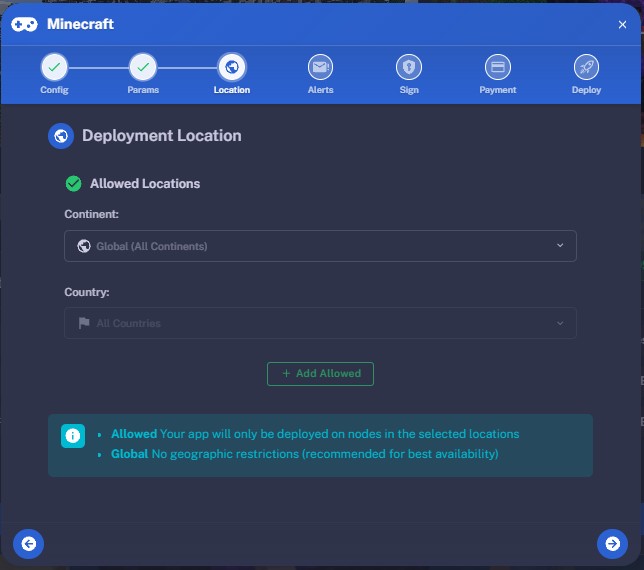
- Deployment Location
- Configure whether you want your Minecraft server to deploy in specific geographic regions:
- Global (Recommended): No geographic restrictions for best availability.
- Custom: Restrict by continent or country.
- Click the blue Continue arrow to proceed.
- Email Notifications
- Optionally enter your email address to receive notifications about your game server, including:
- When your application finishes launching.
- When the primary server changes.
- When your app expiration date is approaching.
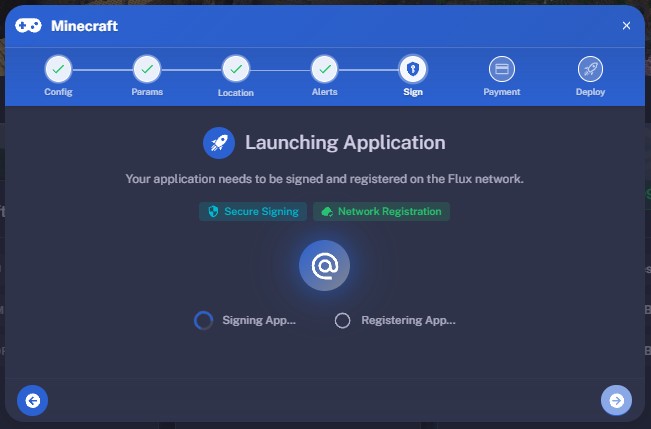
- Launching the Application
- Your application must be signed and registered on the Flux network.
- Click Sign and Register.
- Sign the message using the pop-up.
- If you logged in via Google or Email, this step is completed automatically.
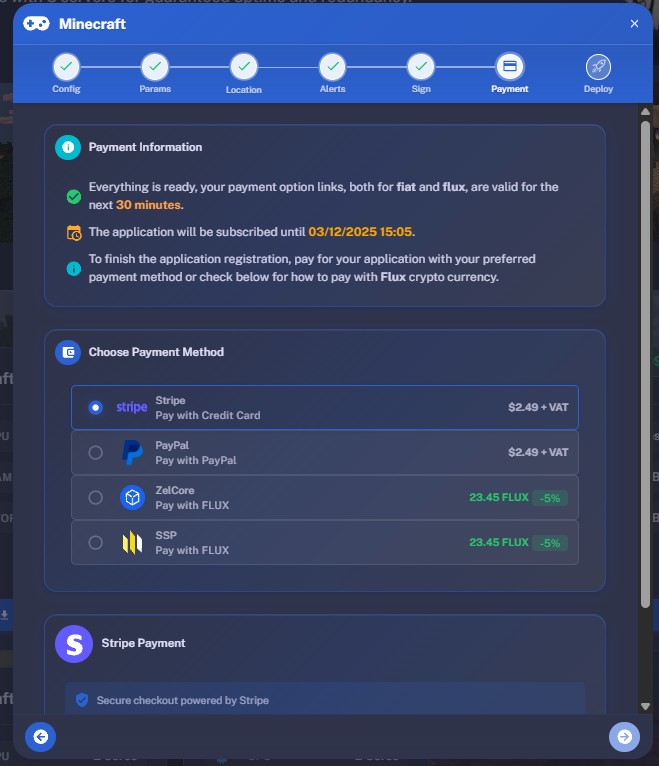
- Complete Payment
- Choose your payment method:
- Fiat: Stripe or PayPal
- Crypto: FLUX coin (5% discount)
- Payment is monitored automatically. Once confirmed, your application will be deployed, and a blue Manage button will appear—directing you to your application’s management panel.
⚠️ Important: FLUX Payments
FLUX payments are only accepted via the FLUX Mainnet, not through any of our EVM tokens.
We ALSO strongly recommend not sending FLUX payments from exchanges, as:
- Transactions or withdrawals may not complete within the required 30-minute window.
- Many exchanges do not support adding a MEMO, which is required for proper payment processing.
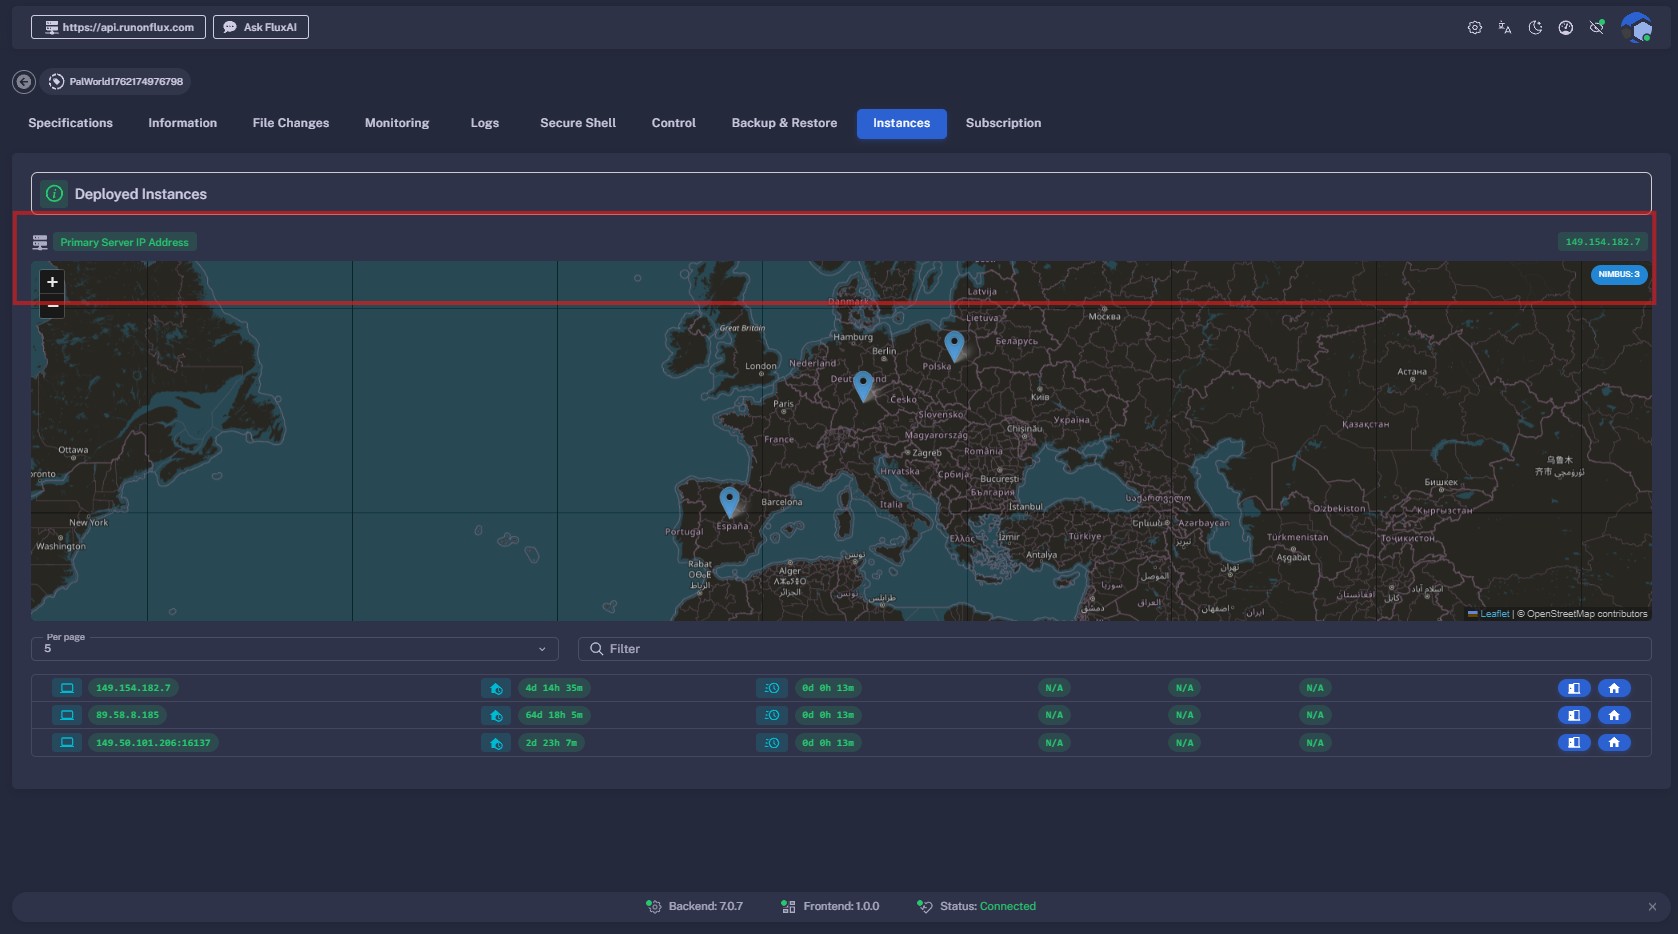
Finding our your IP of the Game Server
Flux runs on a decentralized network, meaning your application is deployed across three instances.
For game servers, a Primary/Standby setup is used — your game runs on the primary instance, while others are on standby for redundancy.
To find your server’s primary IP address:
- Visit cloud.runonflux.com and log in.
- Go to Applications → Management.
- Click the Settings icon on your Minecraft Server.
- Open the Instances tab.
- The Primary IP address is shown here.
- You can also view geolocation details for all instances.
To connect to your server:
- In Minecraft, go to Multiplayer.
- Click Add Server.
- Copy the Primary IP address and paste it into the server address field.
- Click Done and start playing!
Connecting via Domain Instead of IP
Every FluxCloud Marketplace game server is also reachable through its application domain. Flux's load balancer forwards traffic over DNS and is already configured with the correct game port, so you keep a stable address even when the primary instance changes due to failover.
-
Find your app domain under Applications → Management → Information.
-
Use it in the Minecraft Server Address field in place of the IP:
your-app-domain.app.runonflux.io
Using the domain means your saved server entry continues to work automatically after any primary switch.
Frequently Asked Questions
How can I update my game server to the latest version?
By default (VERSION set to LATEST), your Minecraft server automatically checks for updates during startup and at regular intervals. If you’d like to update immediately, you can do so from your application’s management panel.
Simply open the Applications → Management section on FluxCloud, select your Minecraft server, and go to the Control tab. From there, choose Local and click Restart Application. This will redeploy your server with the latest available version.
Can I pin my server to a specific Minecraft version?
Yes. When deploying, expand Show Advanced and set the VERSION field to the Minecraft version you want (for example 1.21.1). Any value other than LATEST locks the server to that version — auto-update checks are skipped, and your server keeps running that version across restarts and primary failovers.
This is the intended setup for modded servers (Forge, NeoForge, Fabric): mods are tied to a specific Minecraft version, so leaving the server on LATEST would eventually break mod compatibility when a new Minecraft release lands.
What port does Minecraft Java use?
Minecraft Java Edition dedicated servers use TCP port 25565 for gameplay traffic. FluxCloud exposes this port automatically. When connecting by IP you must specify the port (1.2.3.4:25565); when connecting by the app domain the port is resolved by DNS and you do not need to append it.
How do I upload custom mods or plugins to my server?
The management panel for your application includes a volume browser that lets you upload, download, and edit files directly in the persistent data folder. To install custom mod or plugin jars:
- From Applications → Management, open your Minecraft server.
- Stop the application from the Control tab so the files aren't in use.
- Open the volume browser, navigate to the
mods/folder (for Forge, NeoForge, or Fabric) or theplugins/folder (for Paper). - Upload your
.jarfiles. - (Optional) Adjust configuration under
config/or editserver.propertiesdirectly in the browser. - Start the application from the Control tab.
Because the data folder is automatically replicated across all 3 instances of your application, your uploaded mods sync to the standby instances — you don't need to upload to each one separately.
💡 Tip: For modded servers, remember to also pin the Minecraft VERSION at deploy time (see above) so the server doesn't try to auto-update and break mod compatibility.
What happens if the primary server goes down?
If your current primary server becomes unavailable or experiences downtime, one of the standby instances automatically takes over as the new primary after a short delay. All your game data remains intact, so you can continue right where you left off once the switch is complete. You can check which instance is currently the primary from your application’s management panel under the Instances tab.
💡 Tip: If you connect via the app domain (
your-app-domain.app.runonflux.io, no port suffix) instead of the raw IP, your client will keep reaching the correct primary automatically after a failover.
What if a new version of the game server is released and my server doesn’t update automatically?
If your server is using the default VERSION of LATEST, it updates itself automatically during startup or periodic checks. If it hasn’t updated yet, a simple restart from the management panel will trigger the update and ensure you’re running the latest version.
If you pinned a specific VERSION at deploy time, this is expected — the server stays on the version you pinned and will not auto-update. To run a different Minecraft version later, deploy a new server with the desired VERSION value.
Can I change my server's hardware specifications after deployment?
Yes. At any time — if you feel the hardware specifications no longer reflect your needs — you can adjust them from Applications → Management → Update App Specifications on the Components tab. Your world saves, settings, and data are preserved across the change, and you are billed according to the new specifications.