Components
The Components tab is where you define the technical details for each container that makes up your application.
Overview
In this tab, you define and manage each container (component) that makes up your application.
- Click the "+" icon to add a new component
- Use the "red x" icon to delete or reset an existing component
- Each component is configured independently with its own image, ports, resources, and settings
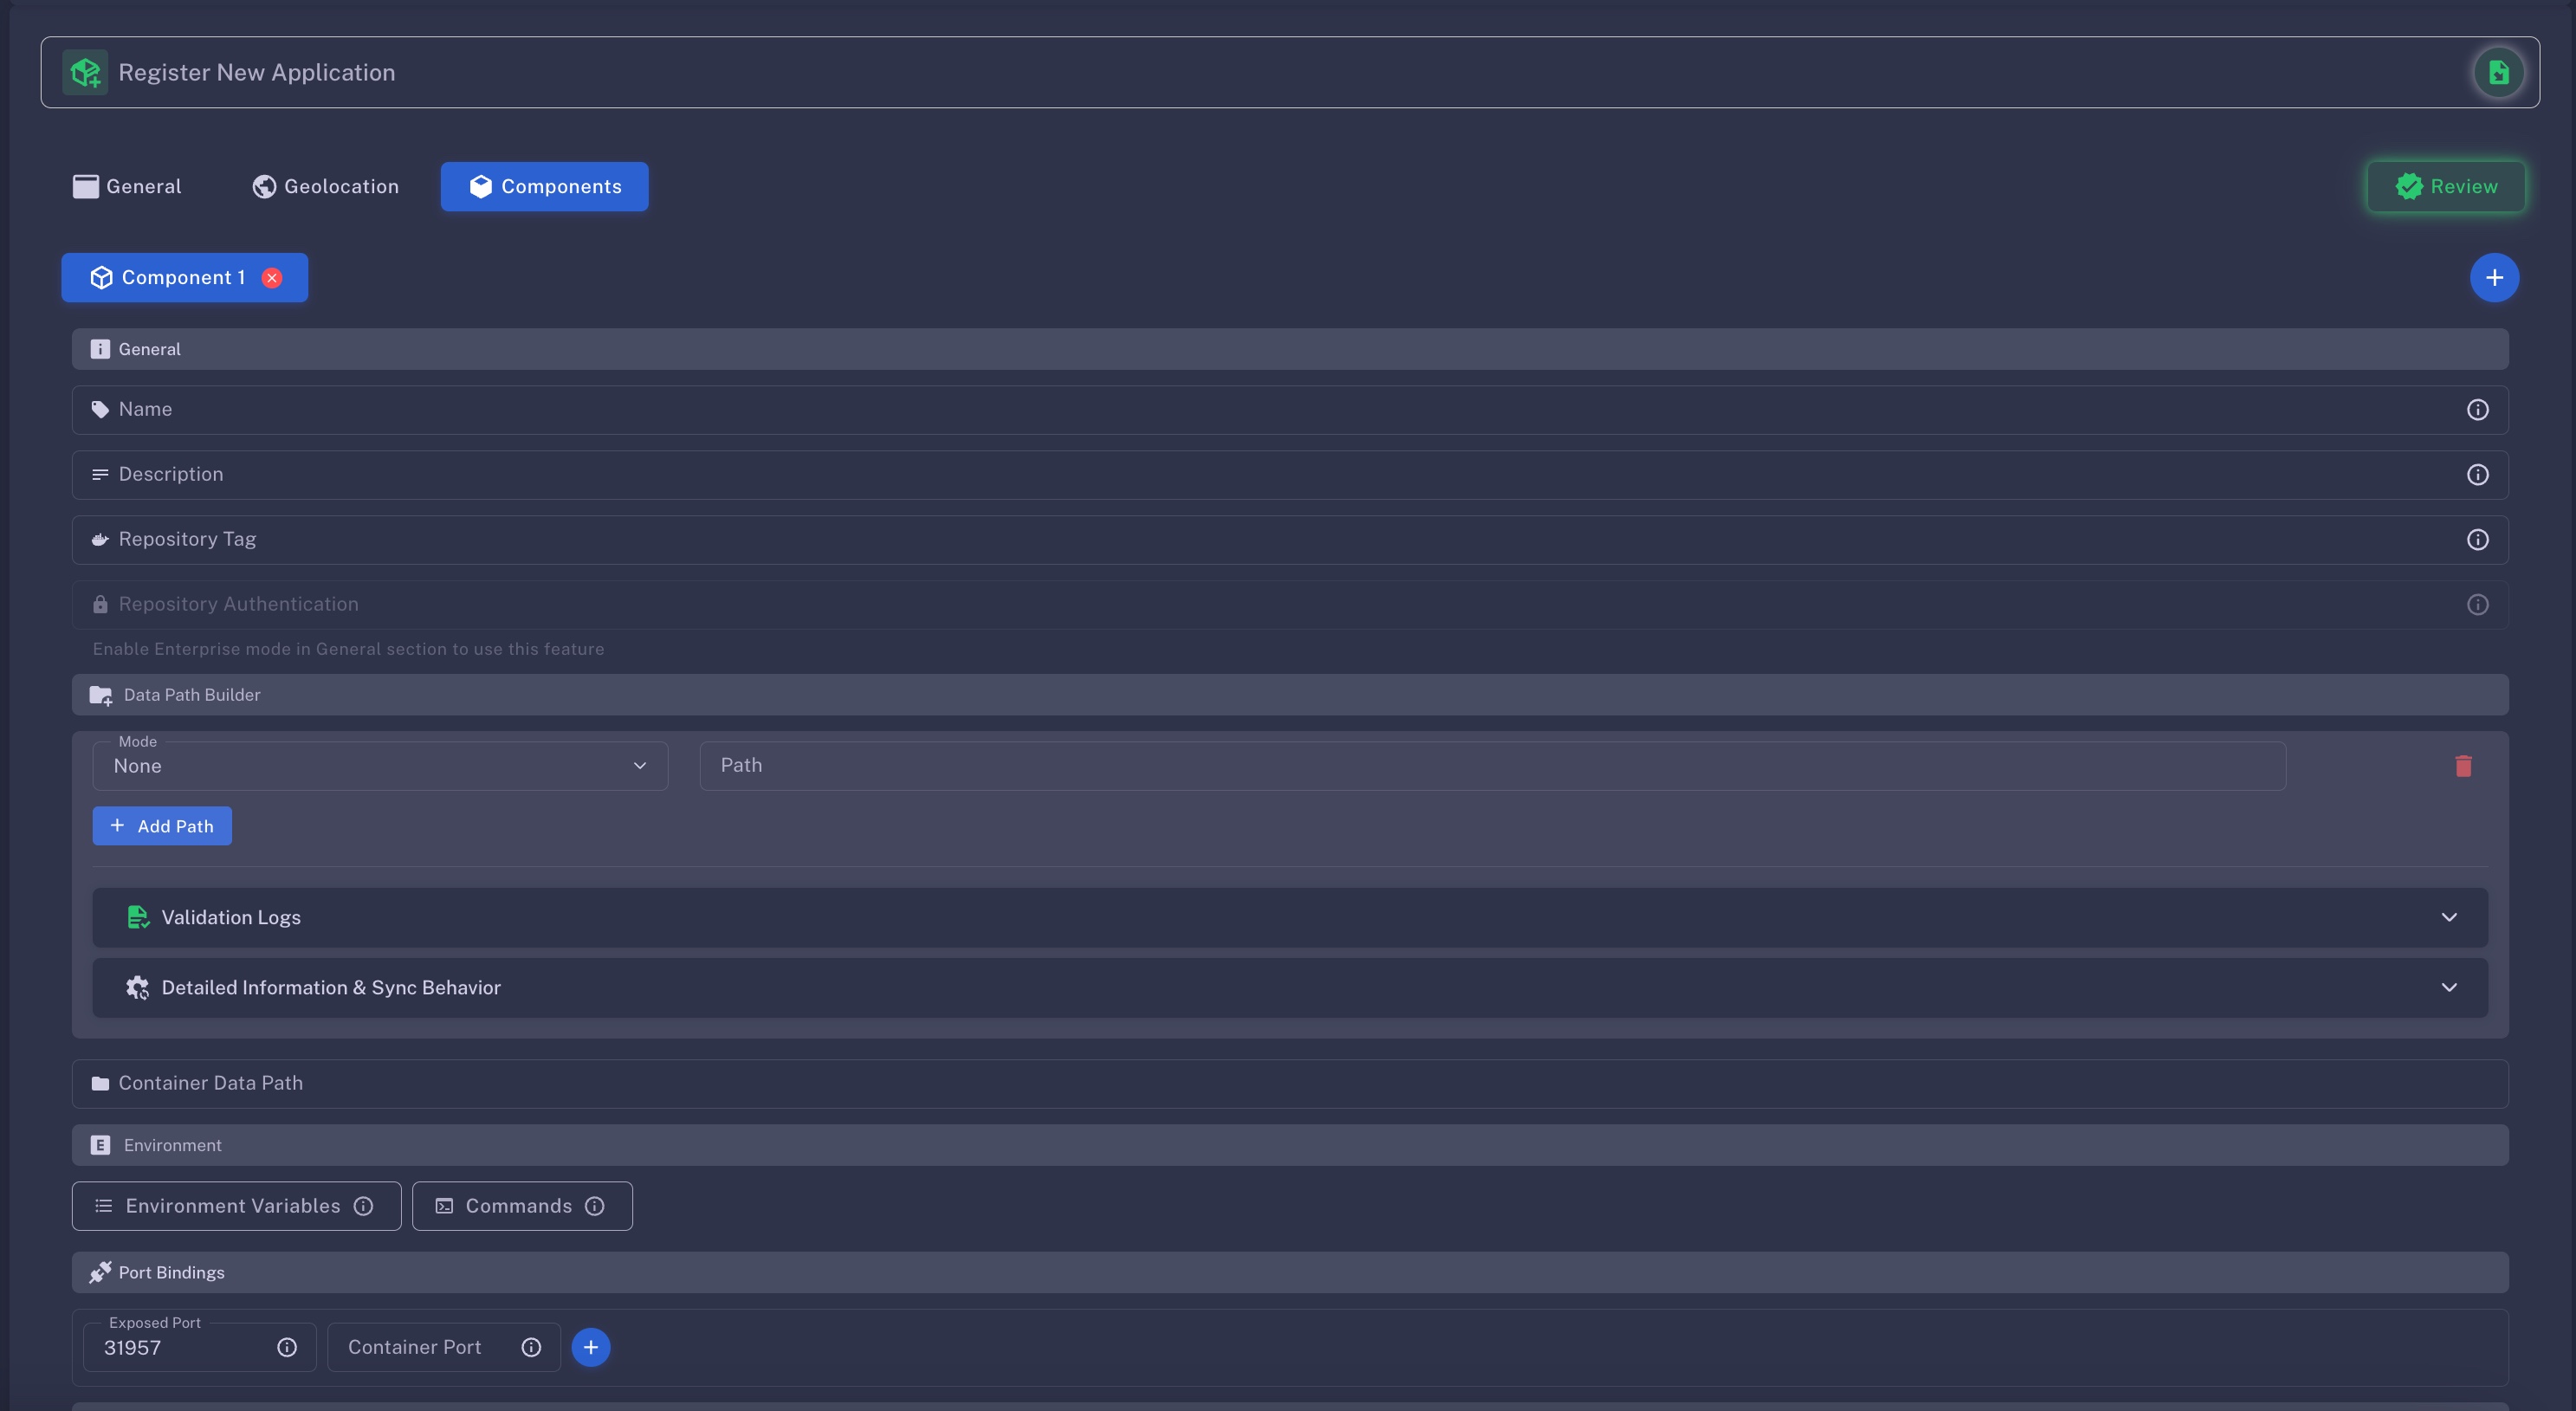
Name
- Must be at least 3 characters long
- Allowed characters: A–Z, a–z, 0–9
- No spaces or special characters allowed
Description
- Must be at least 10 characters long
Repository Tag
Enter the Docker container repository
- Supported formats include:
namespace/repository:tag - Compatible with Docker Hub, GCR, GitHub Packages, and similar registries
Repository Authentication
You need to enable "Enterprise" at the General Tab to use this feature
- Add your Docker authentication username:apikey
Docker Path Builder
Define one or multiple shared data volumes for your container using the format:
/path
Data Path Mode
r:(Replicated After Readiness)
User:to delay data synchronization until all container instances are fully running. This ensures volumes are only mounted and synced when all backends are confirmed live—ideal for consistency in replicated setups.g:(Primary/Standby)
Useg:to enable a primary/standby configuration. One instance acts as the primary (read–write), while the others stay in standby mode and only replicate changes from the primary.- No Prefix
If no prefix (r:org:) is used, the path is treated as a standard local volume. These are non-persistent and not synchronized between instances.
ℹ️ Extent "Detailed Information & Sync Behavior" for more detailed information.
Environment Variables (Optional)
Define environment variables for your container using the syntax:
VARIABLE=value
- Click the "Environment Variables" button
- Enter a Key, and Value, then click the "+ icon" to save the entry.
- You can add multiple ENV entries
- You can import ENVs from JSON
- Format: JSON array of strings
- Example:
["KEY=value", "FOO=bar", "PORT=3000"]
- ⚠️ Environment variables are publicly accessible via the FluxCloud API if you have not enabled "Enterprise" in the General Tab.
Commands (Optional)
Define CLI commands for your container in JSON array format
Example: ["--logs", "--history", "version"]
- Click the "Commands" button
- Enter the command, then click the "+ icon" to save the entry.
- You can add multiple run commands
- You can import Commands from JSON
- Format: JSON array of strings
- Example:
["npm install", "npm run build", "node server.js"]
- ⚠️ Commands are publicly accessible via the FluxCloud API if you have not enabled "Enterprise" in the General Tab.
Port Bindings
Set both the Exposed Port and the Docker Container Port
- Click the "+ icon" to save the entry
- You can add multiple port forwarding rules
Port Guidelines:
- Exposed Port must be between 1024–65535
- Restricted ports (do not use):
['16100–16299', '26100–26299', '30000–30099', 22, 23, 25, 123, 161, 512, 513, 3388, 3889, 4444, 5800, 5900, 5901, 8384, 27017]
- Restricted ports (do not use):
- Docker Container Port should correspond to your app’s internal port (e.g.,
80for web servers)
Custom Domains (Optional)
Once a Port Forwarding rule is added, you can assign a custom domain
- For setup instructions, refer to the Custom Domain Setup guide
Hardware Resources
- Specify the CPU, RAM, and storage needed for this component.