Quick Launch
Creating a Quick Launch Project
Navigate to Quick Launch
- From the left-hand menu, click on "Quick Launch."
- Alternatively, select the "Quick Launch" option when creating a new project via the Projects Overview tab.
.png)
Exploring Available Projects
You will see a screen displaying all available Quick Launch projects on the FluxEdge Marketplace.
 (1).png)
Filtering and Searching Projects
- Filter by Service Category: Choose from categories such as Artificial Intelligence, Rendering, Blockchain, and more. Subcategories are available within each service category.
- Search Field: Enter specific project names to quickly locate them.
- Sorting Features: Sort projects alphabetically, by likes, or by popularity.
Project Information
- Info Icon: Click the info icon on a project tile to view more details, including a summary, relevant links, screenshots, and more.
Selecting and Launching a Project
Once you find the Quick Launch project you want to deploy, click on the project tile to proceed to the next UI.
Using the Deployment Builder
Upon accessing the custom deployment UI, you will be directed to the builder option by default. This tool allows you to customize your project using user-friendly building blocks tailored to your specific needs.
.png)
General Settings
- Name: Enter your project name.
- Docker Image: The Docker image repository of this project
Resource Allocation
Specify the resources for your deployment and its Kubernetes pod:
- CPU (Cores)
- RAM
- Ephemeral Storage
To leverage a GPU, check the GPU box and select the GPU count, manufacturer (e.g., NVIDIA or AMD), and model.
Finalizing the Deployment
When all deployment specifications are complete, click the "Create Deployment" button. You will then see a screen displaying all available machines based on your chosen resources.
Selecting a Machine for Rental
Machine Selection
You will have options to choose between different rental types, such as dedicated GPU or shared GPU. Your choice can affect both pricing and performance.
Machine Data Table
At the top, you will see a summary of your custom deployment name and resources. Below, a data table provides detailed information about available machines with filters for price, benchmark score, operating system, region, and advanced filters.
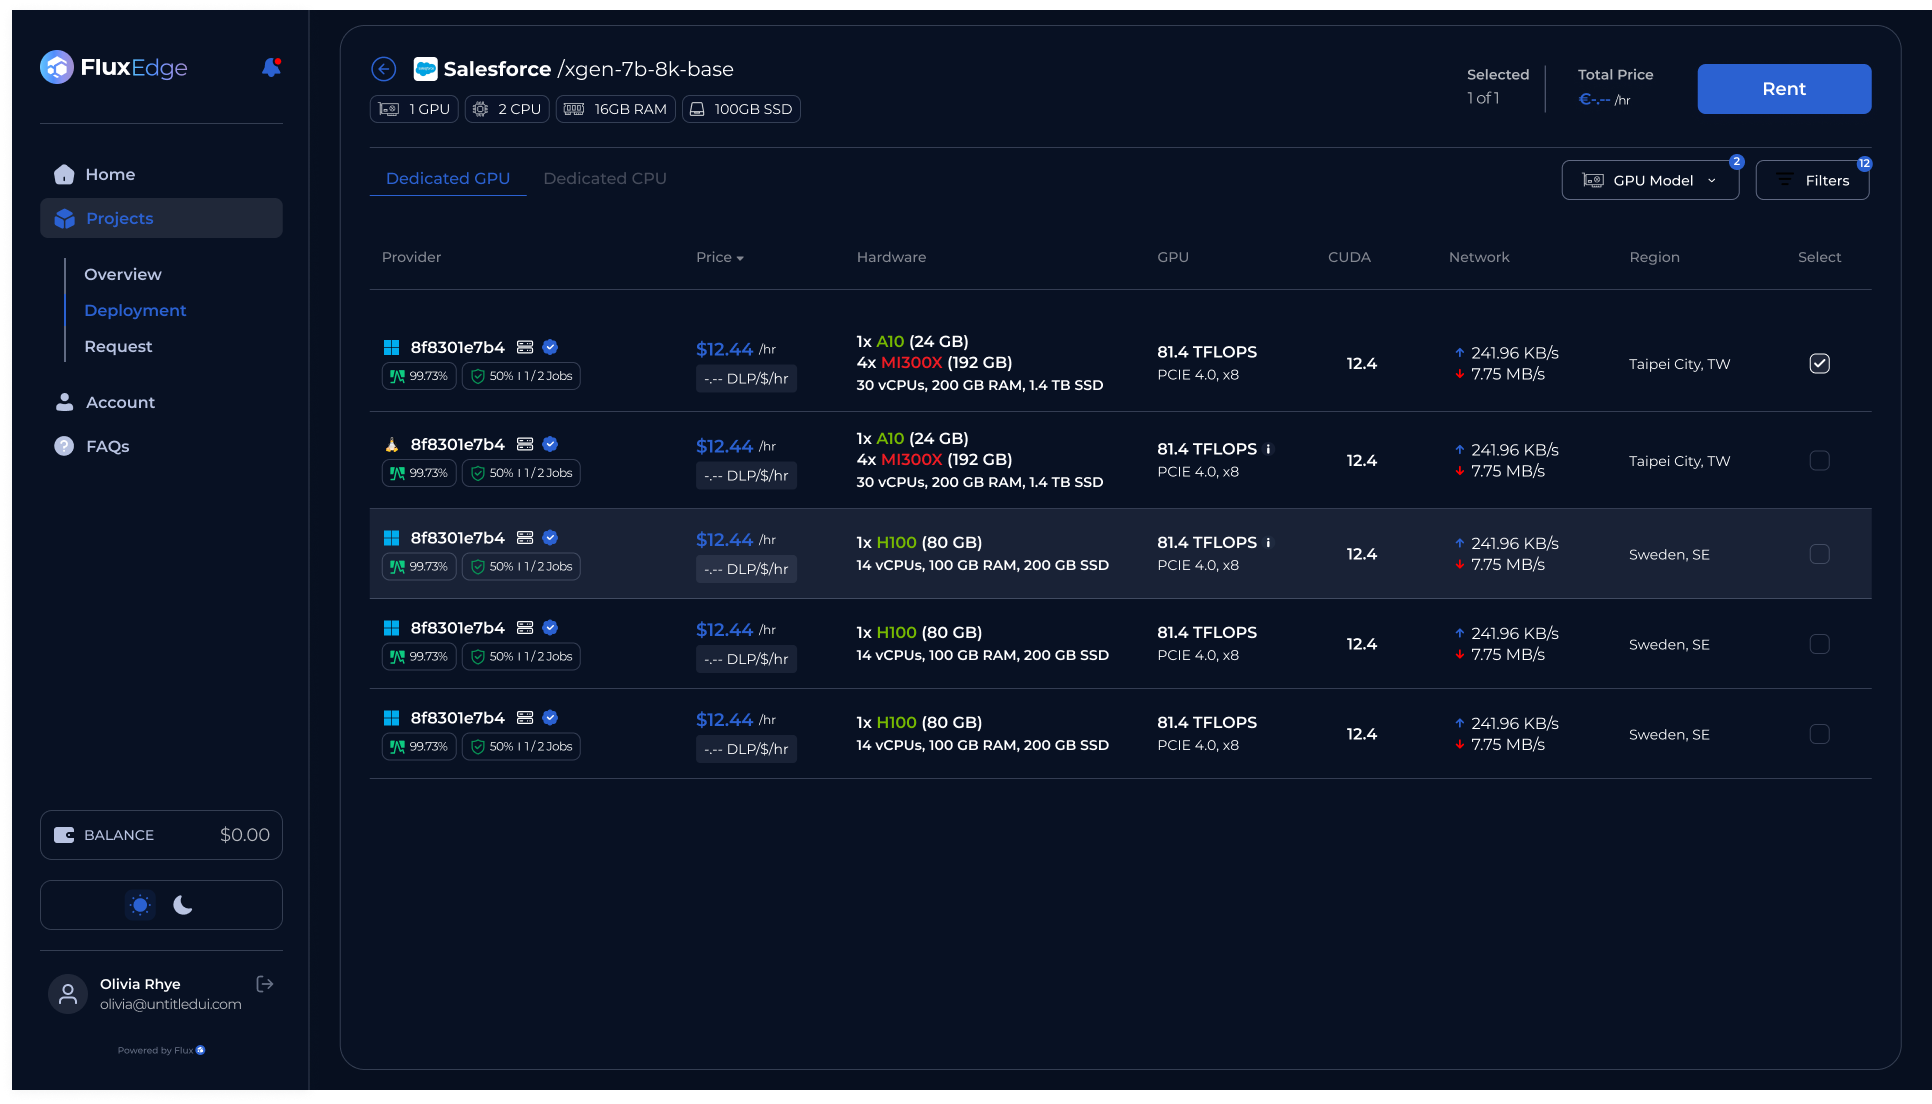
- Machine Name: Last ten digits of the machine's Hash ID.
- Machine Uptime: Duration the machine has been running continuously.
- Machine Reliability: Displays the percentage of rentals completed without disruptions. It also shows the number of completed jobs without interruptions and the total number of leases throughout the machine's lifetime.
- Price: Hourly cost of the machine.
- Score/$/h: Score per dollar per hour for the machine.
- System: Operating system of the machine.
- Hardware Specifications: GPU, vRAM, cores, RAM, and storage.
- GPU Stats: Specific stats like teraflops and max CUDA configuration.
- Location: Physical location of the machine.
Confirming the Rental
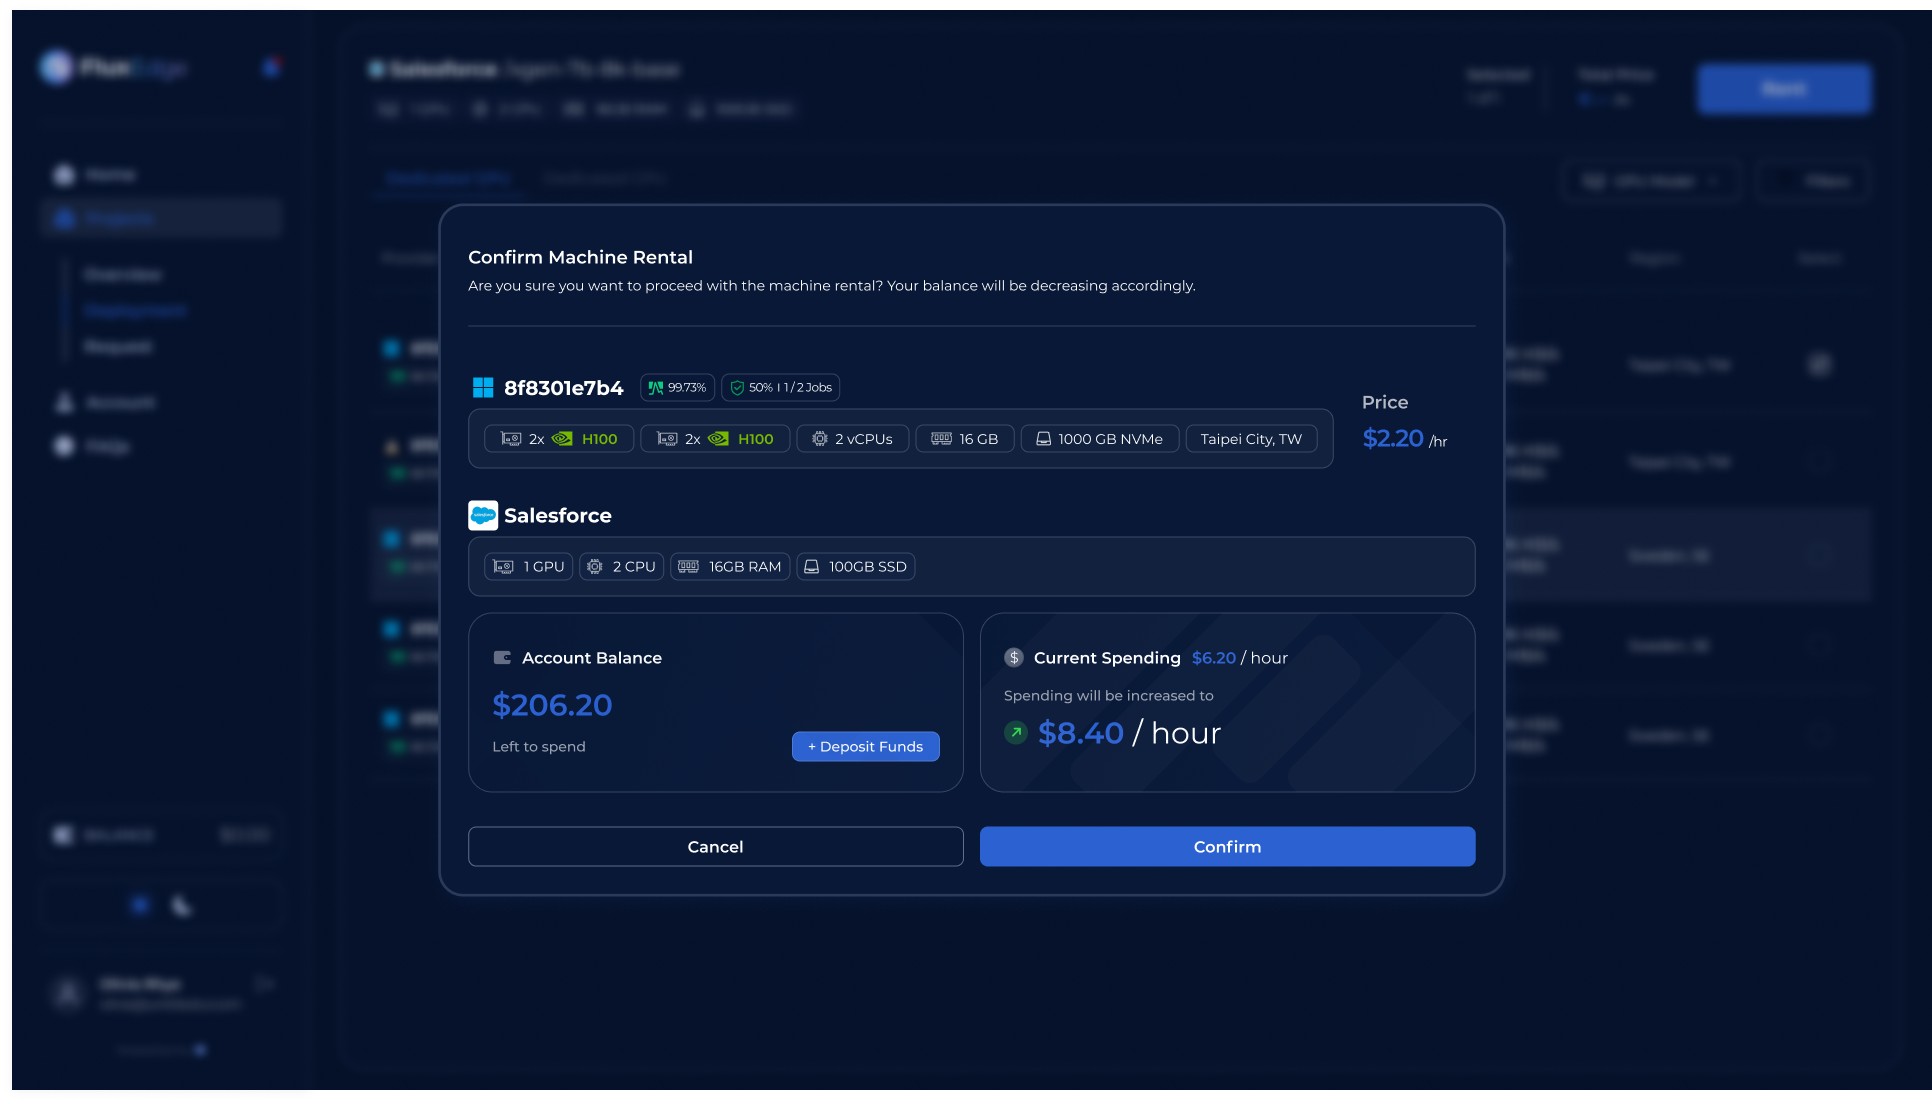
Select your desired machine via the radio button. At the top of the screen, you will see a summary of your selection with the hourly price. Click the "Rent" button to open a confirmation popup showing a summary of the rental and its financial impact. Confirm to complete the rental and proceed to the Deployments Information screen.
By following this guide, you can efficiently create a quick launch rpoject and select the optimal machine for your needs on FluxEdge.